
MS Power Automate Integration Solution
This topic describes how to set up a flow for using CandidateZip Resume/Job Parser via MS Power Automate and makes an automated recruiting process.
You can create a flow in the MS Power Automate for using CandidateZip Resume/Job Parser
as follows:
- Using existing template
- Creating flow manually
Create Flow using Template
Follow the below steps to create a workflow using a template in the MS Power
Automate.
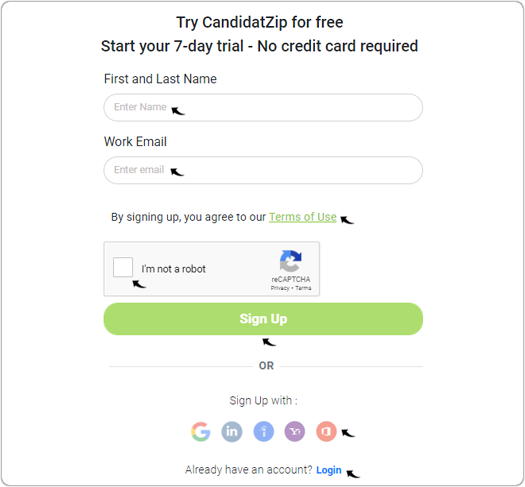
- Visit https://www.candidatezip.com/ and click Sign Up For Free to open the https://app.candidatezip.com/SignUp website.
- On Sign Up page, enter the First and Last Name and Work
Email. Read the Terms of Use, check the checkbox for I'm
not a robot, and click Sign Up. If you already have
CandidateZip account, click Login for your CandidateZip account.Note: You can also sign up using a social account such as Gmail, LinkedIn, or other accounts as necessary.
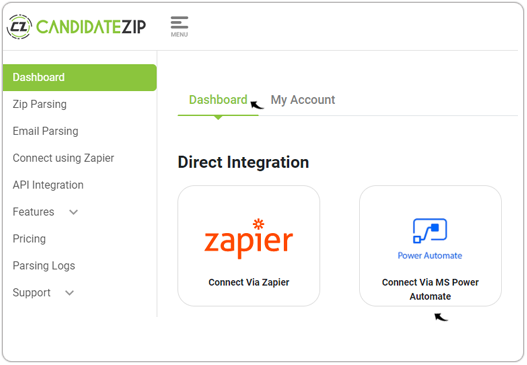
- On the Dashboard tab, click the Power Automate application
that opens the MS Power Automate webpage.
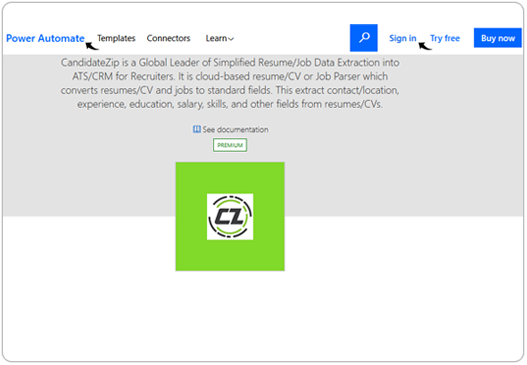
- Sign in to the MS Power Automate application.
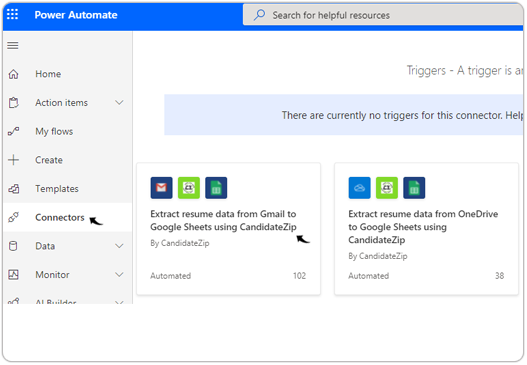
- Once you sign in to the MS Power Automate webpage, click Connectors
on the navigation panel. Click any template flow, for example, click
Extract resume data from Gmail to Google Sheets using
CandidateZip and connect flow in next step-6.Note: In this example, CandidateZip is connected with Gmail to parse the attachment data and store it on Google sheet, you can use any other template and follow similar steps.
- Click to
 icon and connect to your
Gmail, CandidateZip Resume/Job Parser, and Google
Sheets accounts. Once you connected successfully to all your
accounts, click Continue.
icon and connect to your
Gmail, CandidateZip Resume/Job Parser, and Google
Sheets accounts. Once you connected successfully to all your
accounts, click Continue.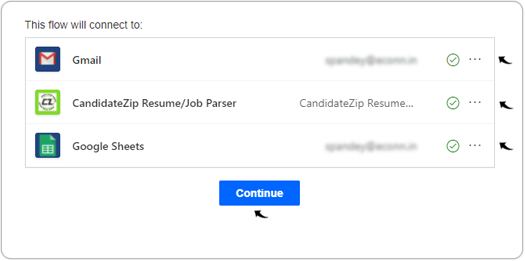
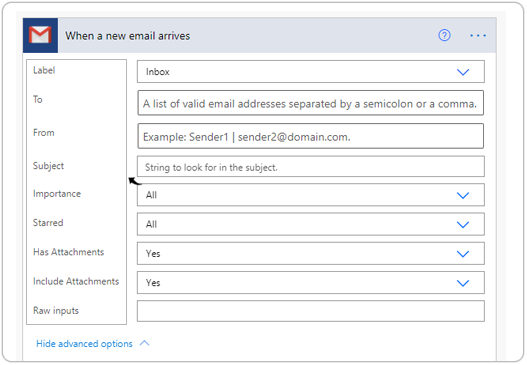
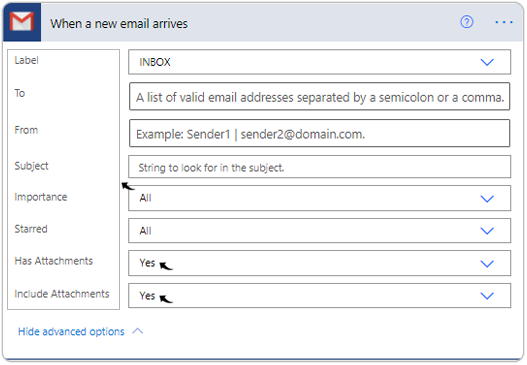
- On the When a new email arrives box, click Show advanced
options to view all the fields and fill as necessary.Note: Click and add new
connection to email, if necessary.
- On the Apply to each box, fields are filled as per the template by
default; you can change as necessary.
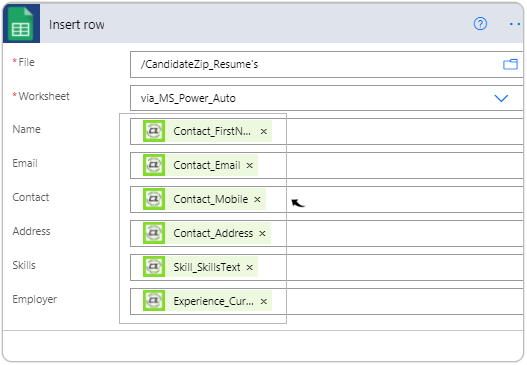
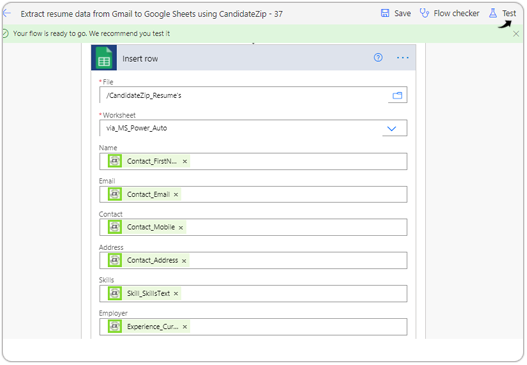
- On the Insert row box, select the fields as follow:
- File: For this field, select the google sheet from your google drive.
- Worksheet: For this field, select the worksheet of the google
sheet.Note:
- Make sure that the column such as Name, Email, Address, etc, are defined in the worksheet against which you parsed data will be mapped.
- Click
 icon and make sure that the correct Gmail ID is
connected.
icon and make sure that the correct Gmail ID is
connected.
- Once you add the google sheet details in the above step, all fields of the
google sheets will be imported and displayed.

- Map the google sheet fields with the CandidateZip fields, for example, the
Name field is mapped with the Contact_FirstName field of
CandidateZip. Once all the fields are mapped, click Save.
- Once you save the flow successfully, click Test to test the
flow.
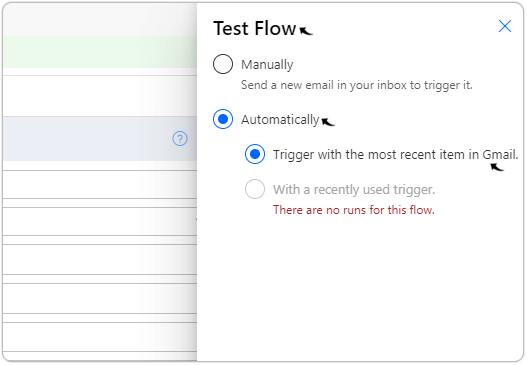
- On the Test Flow box, select either the manual or automatic option.
For example, the test will trigger automatically with the most recent item
in Gmail.
- Once your test runs successfully, a message will be displayed Your flow
ran successfully. Click
 icon to see the
flow details in the next step.
icon to see the
flow details in the next step.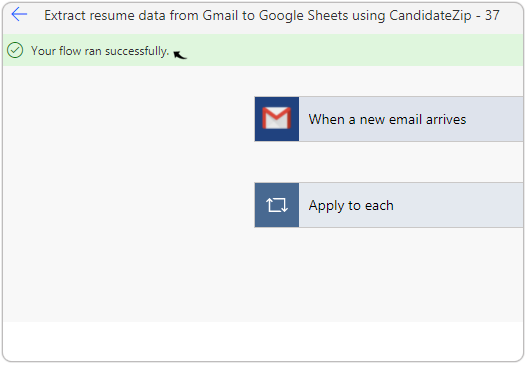
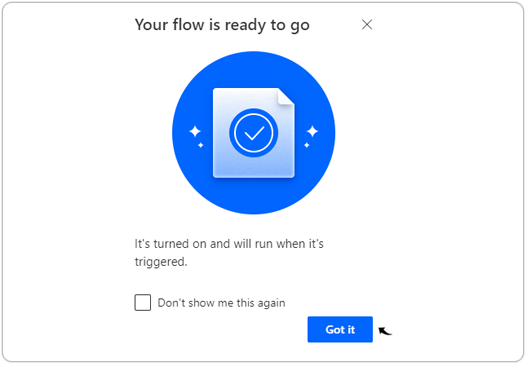
- On the pop-up Your flow is ready to go, click Got it.
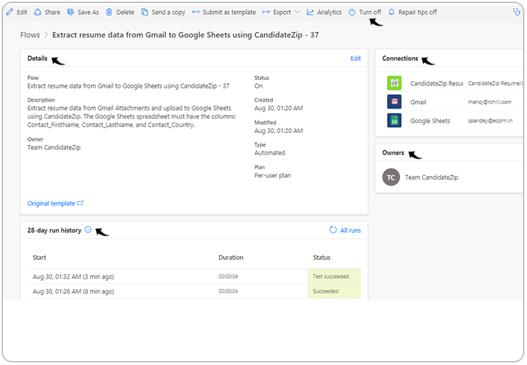
- On the flow details page, Details, History,
Connections, and Owners details will be displayed.Note: Click Turn Off If you want to turn off the autonomous flow of storing the parsed data from the Gmail inbox to the google sheet.
Create Flow Manually
Follow the below steps to create a workflow manually (without using a template) in
the MS Power Automate.
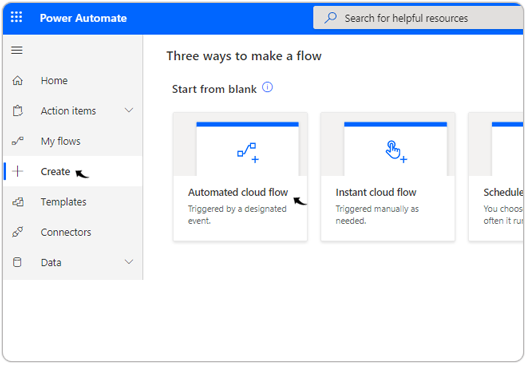
- Once you sign in to the MS Power Automate webpage, click Create on
the navigation and select Automated cloud flow.Note: In this example, Automated cloud flow is selected to create flow, you can select other available options to create the flow.
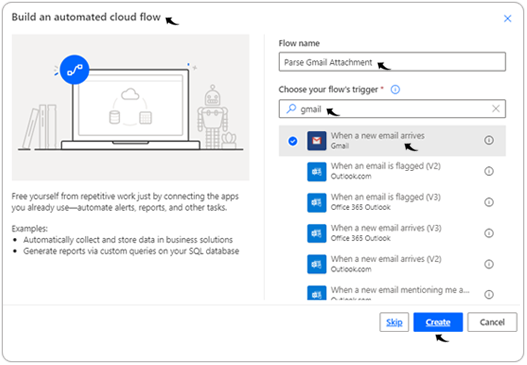
- On Build an automated cloud flow pop-up, select the fields as follows
and click Create.
- Flow name: For this field, enter a name for the flow, for example, Parse Gmail Attachment.
- Choose your flow's trigger: For this field, select an application to trigger the flow and a method when the flow will trigger. For example, you can select the Gmail application, and the flow will trigger when a new email arrives in the Gmail inbox.
- On the When a new email arrives box, fill the fields as necessary and
click the New step.
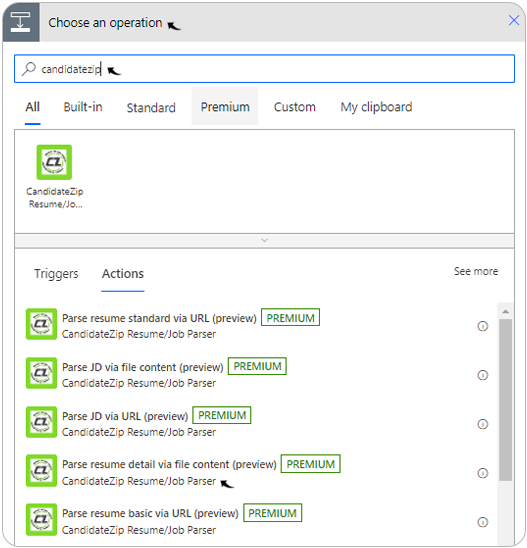
- On the Choose an operation box, enter candidatezip in the search box
and select Parse resume content via file content from the available
Actions drop-down.
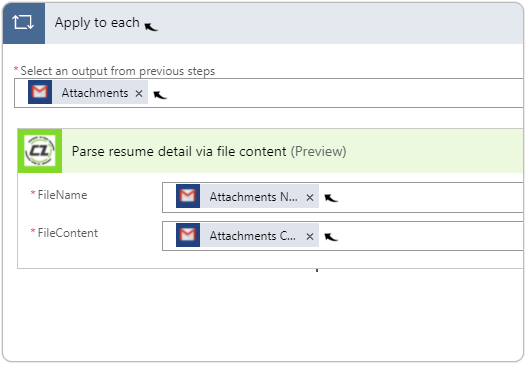
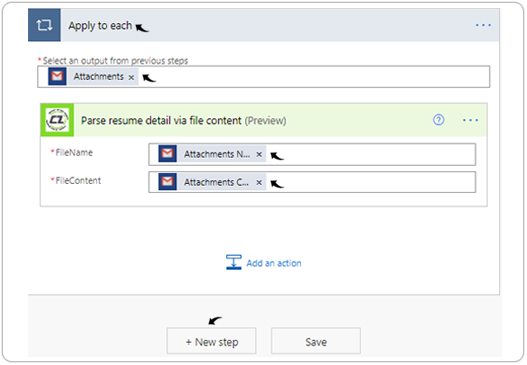
- On the Apply to each box, select the fields as necessary and click
New step, for example:
- Select an output from previous steps: For this field, select Attachments.
- FileName: For this field, click Attachments Name.
- FileContent: For this field, click Attachments Content.
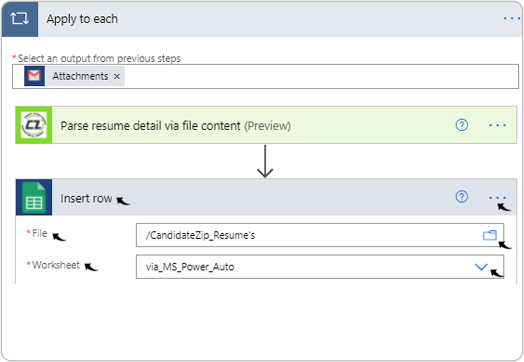
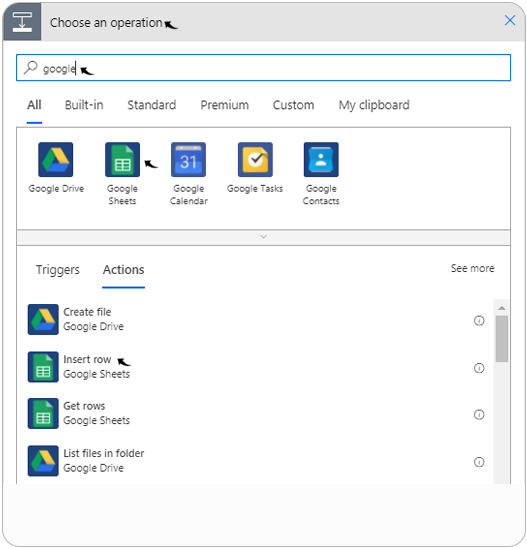
- On the Choose an operation box, search for google as
connecter, select Google Sheets, and select Insert row from
the Action drop-down.
- On the Insert row box, select the fields as follows:
- File: For this field, select the google sheet from your google drive.
- Worksheet: For this field, select the worksheet of the google
sheet.Note:
- Make sure that the column such as Name, Email, Address, etc, are defined in the worksheet against which you parsed data will be mapped.
- Click icon and make sure that the correct Gmail ID is
connected.
- Once you add the google sheet details in the above step, all fields of the
google sheets will be imported and displayed.
- Map the google sheet fields with the CandidateZip fields, for example, the
Name field is mapped with the Contact_FirstName field of
CandidateZip. Once all the fields are mapped, click Save.
- Once you save the flow successfully, click Test to test the
flow.
- On the Test Flow box, select either the manual or automatic option.
For example, the test will trigger automatically with the most recent item
in Gmail.
- Once your test runs successfully, a message will be displayed
"Your flow ran successfully". Click icon to see the flow details in the next
step.
- On the pop-up, Your flow is ready to go, click Got it.
- On the flow details page, Details, History,
Connections, and Owners details will be displayed.Note: Click Turn Off If you want to turn off the autonomous flow of storing the parsed data from the Gmail inbox to the google sheet.
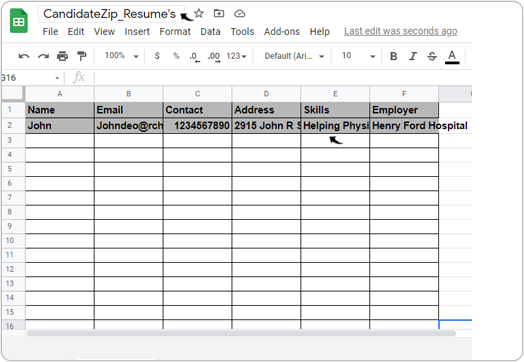
- Once your integration is successful in step-12 above, the parsed data will be successfully
stored in the google sheet. This confirms the successful integration.
Result
Once the integration of CandidateZip and MS Power Automate (using an existing template or manually) are done successfully as per the above steps, then all the attachments coming to your Gmail inbox afterward will be parsed, and the data will be automatically stored in the google sheets. The process of storing the parsed data in the google sheet from the Gmail attachment becomes autonomous.