
Hubspot Integration
CandidateZip Hubspot Integration lets you create Contacts to your Hubspot CRM directly by adding resume files.
It minimizes the manual effort involved in extracting data from resumes, speeding up the recruitment process. Follow the below procedure to integrate CandidateZip with the Hubspot application.
Integration Procedure
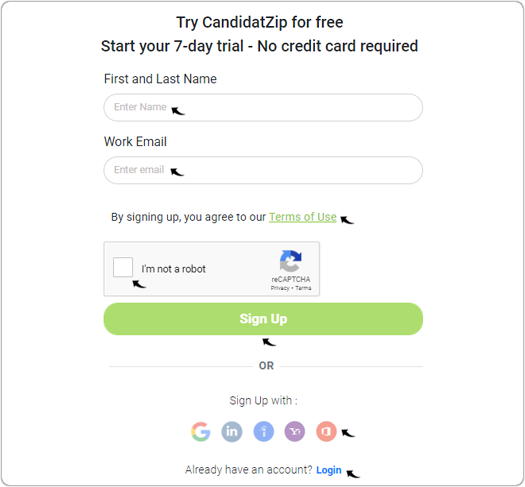
- Visit https://www.candidatezip.com/ and click Sign Up For Free to open the https://app.candidatezip.com/SignUp website.
- On Sign Up page, enter the First and Last Name and Work
Email. Read the Terms of Use, check the checkbox for I'm not a
robot, and click Sign Up. If you already have CandidateZip
account, click Login for your CandidateZip account.Note: You can also sign up using a social account such as Gmail, LinkedIn, or other accounts as necessary.
- Once you log in to the CandidateZip, scroll to the CRM integration
section and click on Hubspot application.
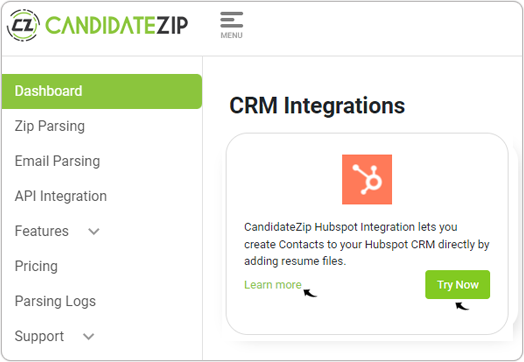
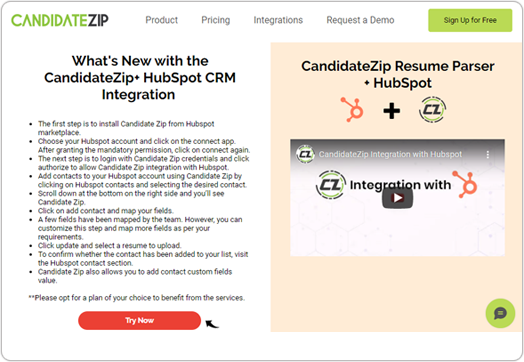
- On the integration page, click Try Now.
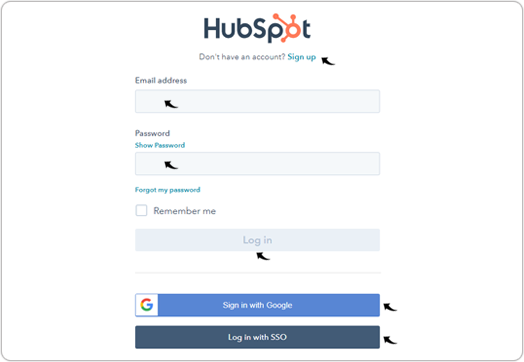
- On the Hubspot login page, click Sign up to create a new
Hubspot account or enter your existing Email address, Password,
and click Log in.Note: You can also log in to your Hobspot account using Google or SSO sign-in options.
- On the integration page, choose your account and click Choose
Account.

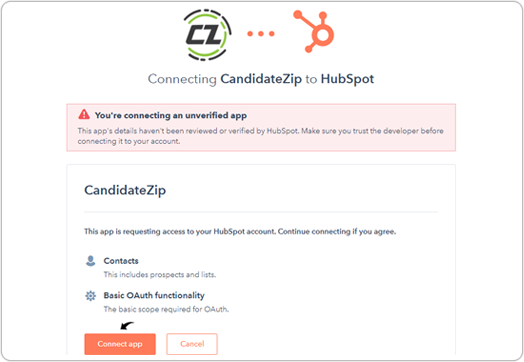
- Click Connect app to allow CandidateZip access to your Hubspot
account.
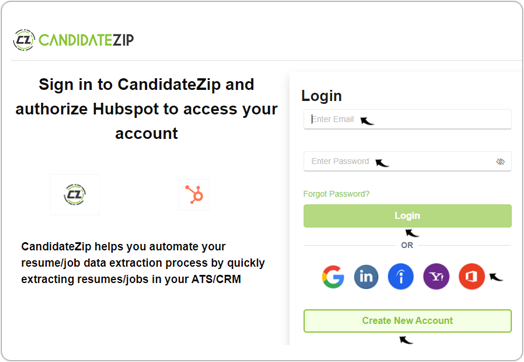
- Log in to your CandidateZip to authorize Hubspot to access your CandidateZip
account. Enter your Email and Password to log in to the
CandidateZip Account.Note: You can also log in using Gmail, LinkedIn, or other accounts as necessary.
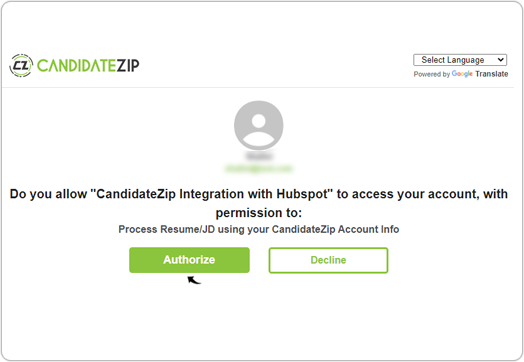
- Click Authorize to allow CandidateZip integration with Hubspot.
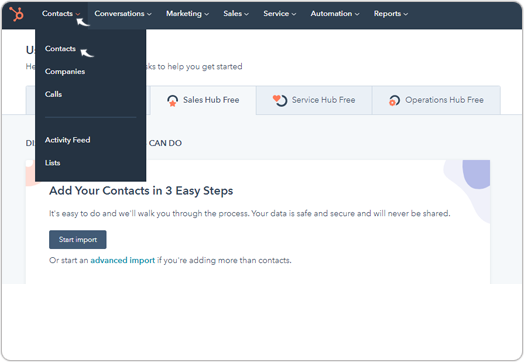
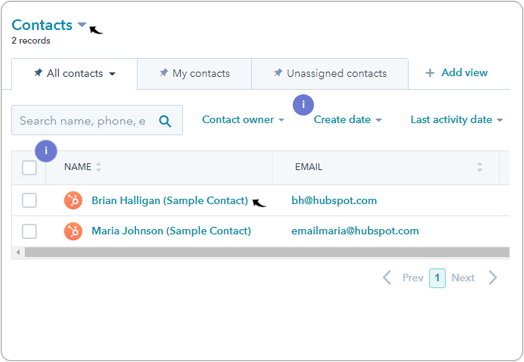
- On your Hubspot account, click Contacts, and from the drop-down, select
Contacts again.
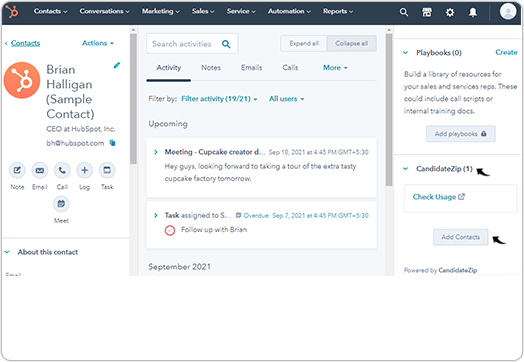
- On the Contacts page, click on any contact.
- Scroll down the right box and click Add Contacts under the
CandidateZip section.
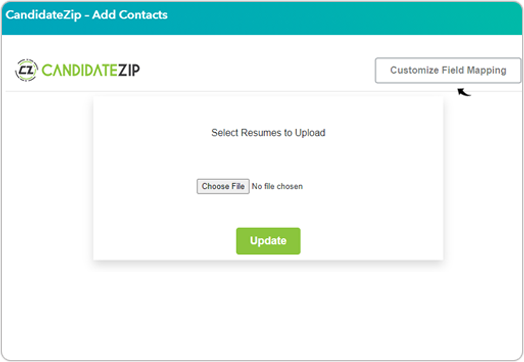
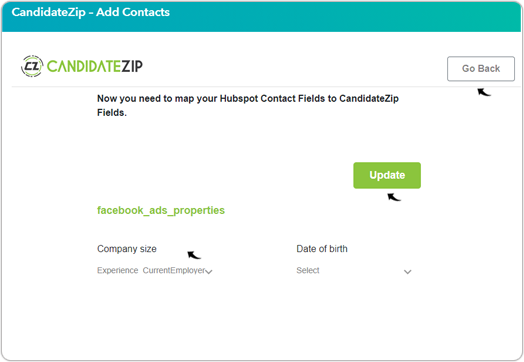
- On the CandidateZip - Add Contacts pop-up, map the Hubspot
candidate fields to the CandidateZip fields and click Update.

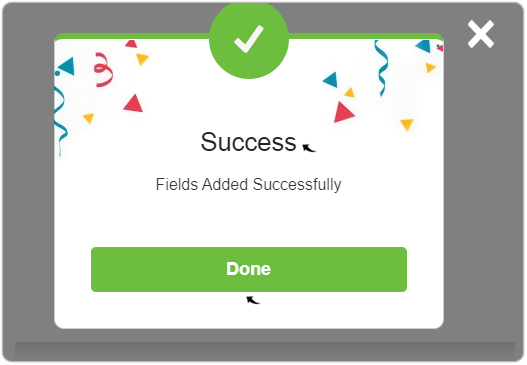
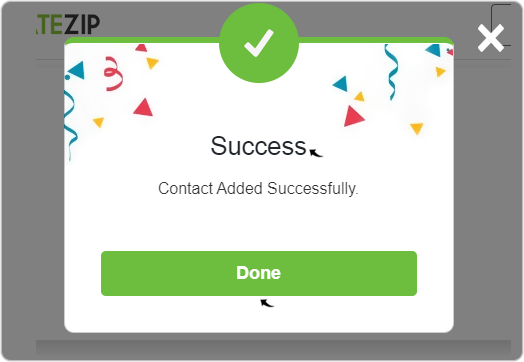
- Once the fields are mapped successfully, a Success pop-up will be
displayed. Click Done on the Success pop-up.
- Click Customize Field Mapping to customize/update the fields as necessary
to store the resume details in the Hubspot database.Note: You can add/modify the Hubspot fields from the Hubspot application, the same fields will be added/modified on the CandidateZip page.
- Once you customize the candidate fields, click Update and then click
Go Back to upload the resume.
- Click Choose File and upload a resume. Click
Update.

- Once the resume details are added successfully into the Hubspot database, a
Success pop-up will be displayed. Click Done on the
Success pop-up.
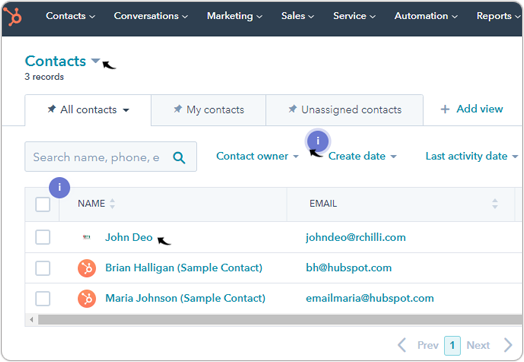
- To view the candidate details on Hubspot, click Contacts, and from the
drop-down, select Contacts again.
- On the Contacts page, you can view all the candidate details that you
uploaded in above step-17. Click any candidate to view the fields details.
- Once you click a candidate on the above step, you can view the candidate's
details. To view complete details, click View all properties.
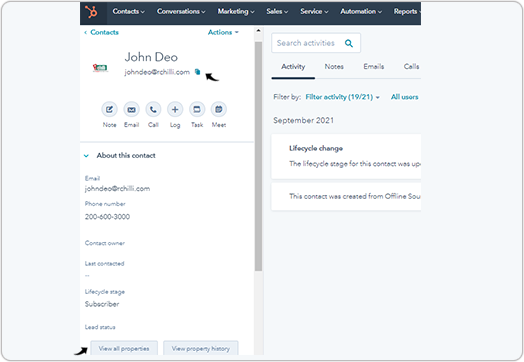
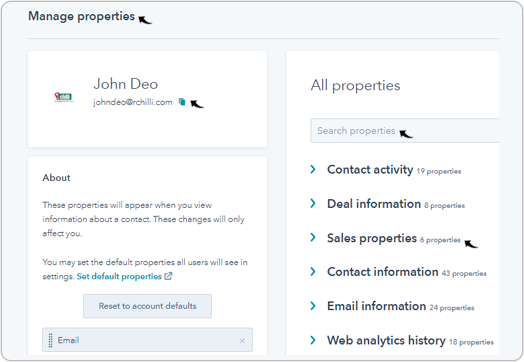
- On the Manage properties page, you can view all the candidate
details. Additionally, you can add/customize the new fields as necessary.Note: Only those properties will have data that you mapped in above step-13.
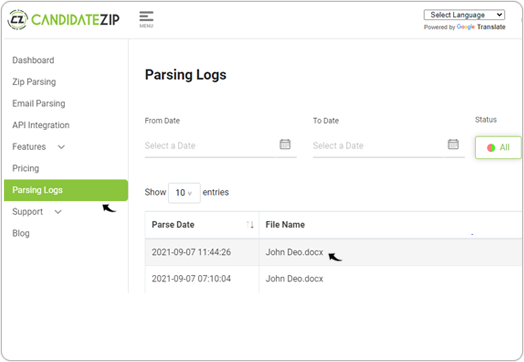
- The Parsing Logs On the CandidateZip account display all the resume that
you uploaded in the Hubspot.
Result
Once the resume is uploaded to the CandidateZip (step-17) page and the parsed data is stored on the Hubspot database (step-22), this completes the successful integration.